How I stopped worrying and learned to love Vue.js

Through the beginning of my career in software engineering, I’ve found it challenging yet helpful to be exposed to multiple different languages and practices. This quickly teaches what languages, frameworks, and solutions can be used for the different problems that arise on a day-to-day basis. However, most of my professional experience lies with backend development in PHP as well as some recent front end development using jQuery and a bit of Angular. With a combination of PHP, Symfony, and jQuery, I’ve been fortunate to build features that I hope both end users and admins alike will appreciate. Many of these features however, are mostly based on relatively simple forms -- the user enters their data using textboxes, dropdowns, radio buttons, etc. and the backend does all of the complicated work.

With one of our new projects here at Setfive, we wanted a rich and reactive user interface for the sign-up portion, while Symfony would handle the rest. We could have just used Angular for the whole thing and come up with something similar, but using Angular would mean we’d need the entire page in Angular -- we didn’t want to lose our Symfony functionality for one component of the page. Using only jQuery was another option, but jQuery can quickly get complicated, hard to read, and unmaintable.  Like with many of the problems we encounter here at Setfive, a little bit of research led to a viable solution.

Introducing: Vue.js -- a JavaScript framework that allows you to build rich JS components similar in design to Angular but without using the framework for the entire page. That last aspect was especially appealing to us. With Vue.js, you can build a single component with whatever functionality you need, and drop it into the HTML at basically any spot in your project and the component can work independently of everything else on that page. Thus this component appears on the page alongside anything else we have on there from our Symfony/Twig side.

Similar to Angular, Vue.js allows you to use asynchronous functions to quickly send info back and forth via GET and POST requests and notably change the information on the page almost instantly. For our project we would be able to do exactly what we wanted to do: create a sign-up section that would allow you to quickly select different sources from different categories, easily view what you can select/have selected, enter your email, and submit -- all in an interactive and easy to use display. The idea was perfect, but the setup not so much.

I imagine that in a scenario where you are creating a project using mostly JavaScript and HTML/CSS, adding a basic Vue component to the project would be pretty easy as the documentation for Vue is solid. However, the process of adding a component to a Symfony project is a bit different, specifically because using Webpack Encore with Symfony is understandably not something that the Vue.js documentation covers. A quick search on the internet found me the perfect guide for integrating Vue.js into a Symfony project. Combining this guide with the actual Vue and Symfony documentation, I was able to get the crucial ‘Hello world’ to display on the page and we were ready to get going.

Similar to the Twig templates we normally use in our Symfony projects, Vue provides a few crucial features that allowed the bulk of this component to work as designed:

  • ‘For loops’ allowed us to display a drop down menu of categories, and a reactive list of sources based on which category was chosen.
  • ‘If statements’ allowed us to display errors and a confirmation message upon submitting
  • With on-click functions, we were able to instantly move sources back and forth between the list of ones they select and ones not yet selected. 
  • The input models allowed us to easily associate string variables with the different textbox inputs, allowing us to add a ‘search’ feature. 

 As someone who is not an expert in JavaScript, figuring all of this out took a lot of debugging. Luckily, the guide mentioned before had a lot of what I needed in it as well as StackOverflow and random other guides and sites found throughout my search. With the instant reactivity of Vue.js, debugging was made easy and I was able to roll through my development without having to spend much if any time waiting for data to load/finish. The main pieces that caused trouble involved making sure items displayed correctly based on what was already selected. That sort of validation of the display had to all be done manually in JavaScript. The validation of submitted data and the usage of that data can be done easily via Symfony, allowing us to use Vue solely to make a reactive and easy to use user interface that we hope will entice people to sign up for this product. 

One of the biggest pros of software development in my eyes is the satisfaction of designing and successfully building something new. Creating something, big or small, in an unfamiliar language/framework heightens that satisfaction even more. A lot of times though, the road to the end product in a new language/framework is filled with tons of frustration and confusion (especially for a relatively new developer). However, building this component using Vue was easier than expected once past my struggles with the initial set up. Thanks to the documentation from Vue and Symfony, StackOverflow, as well as the guide here by Krasimir Hristozov, I was able to create something that works well in a totally new framework without all of the trouble that can normally come with that process. Vue.js is described on their website as a blazing fast, “adoptable ecosystem” that can be used quickly by anyone who knows HTML, CSS, and JavaScript and I can attest to that. For anyone who needs a relatively small reactive component in their project, where you know jQuery will get unnecessarily complicated, Vue.js is the way to go.
nginx: Using auth_request to secure vhosts

One of our clients recently had a unique use case. They had a Wiki site where they wanted to restrict viewing of posts to only their app’s authorized users. Picture something like a SaaS app where the Wiki site had proprietary content that our client only wanted paying users to access.

The two obvious options to implement this would be:

  • Create a Wiki user for each authorized user - this has the downside that we’d need to maintain two accounts, figure out how to keep users logged into both, and deal with synchronizing account data.
  • Modify the Wiki’s application code to authorize the users in some fashion - this is problematic because it would make upgrading the Wiki software difficult.

Turns out there’s a third option which is much smoother! Nginx has a directive called auth_request which allows nginx to authorize access to a resource based on a 2nd HTTP request.

The way it works is:

  • Your SaaS app is setup at platform.setfive.com where users are authenticated by a Symfony application.
  • You configure your Symfony application to send a cookie back with a wildcard domain of “.setfive.com”
  • Your wiki is running at wiki.setfive.com and configured to authorize requests to platform.setfive.com/is-authenticated
  • Now, when users request wiki.setfive.com their browser will send your Symfony authentication cookie, nginx will make a request to platform.setfive.com/is-authenticated, and if they’re authenticated they’ll be granted access to your wiki.

The nginx config for this is pretty straightforward as well. One thing to note is this module is not standard so on Ubuntu you do need to install the nginx-extras package to enable it.

server {
    server_name wiki.setfive.com;

    listen 443 ssl;
    ssl_certificate /etc/httpd/ssl/setfive-ssl.chained.crt;
    ssl_certificate_key /etc/httpd/ssl/setfive-ssl.key;

    ssl_session_cache shared:le_nginx_SSL:1m;
    ssl_session_timeout 1440m;

    ssl_protocols TLSv1 TLSv1.1 TLSv1.2;
    ssl_prefer_server_ciphers on;

    ssl_ciphers "ECDHE-ECDSA-CHACHA20-POLY1305:ECDHE-RSA-CHACHA20-POLY1305:ECDHE-ECDSA-AES128-GCM-SHA256:ECDHE-RSA-AES128-GCM-SHA256:ECDHE-ECDSA-AES256-GCM-SHA384:ECDHE-RSA-AES256-GCM-SHA384:DHE-RSA-AES128-GCM-SHA256:DHE-RSA-AES256-GCM-SHA384:ECDHE-ECDSA-AES128-SHA256:ECDHE-RSA-AES128-SHA256:ECDHE-ECDSA-AES128-SHA:ECDHE-RSA-AES256-SHA384:ECDHE-RSA-AES128-SHA:ECDHE-ECDSA-AES256-SHA384:ECDHE-ECDSA-AES256-SHA:ECDHE-RSA-AES256-SHA:DHE-RSA-AES128-SHA256:DHE-RSA-AES128-SHA:DHE-RSA-AES256-SHA256:DHE-RSA-AES256-SHA:ECDHE-ECDSA-DES-CBC3-SHA:ECDHE-RSA-DES-CBC3-SHA:EDH-RSA-DES-CBC3-SHA:AES128-GCM-SHA256:AES256-GCM-SHA384:AES128-SHA256:AES256-SHA256:AES128-SHA:AES256-SHA:DES-CBC3-SHA:!DSS";

    root /var/www/html/wiki;
    index index.php;

    auth_request /is-authenticated;

    location = /is-authenticated {
        internal;
        proxy_pass https://platform.setfive.com/is-authenticated;
        proxy_set_header Content-Length "";
     }

     location / {
        # This is cool because no php is touched for static content.
        # include the "?$args" part so non-default permalinks doesn't break when using query string
        try_files $uri $uri/ /index.php?$args;
     }

    location ~ \.php$ {
      fastcgi_pass   unix:/run/php-fpm/www.sock;
      fastcgi_split_path_info ^(.+\.php)(/.*)$;
      include fastcgi_params;
      fastcgi_param  SCRIPT_FILENAME    $document_root$fastcgi_script_name;
      # fastcgi_param  HTTPS              off;
    }

}

Spring Boot: Creating a filter to verify an API key header

Phew! Been awhile but we’re back!

NOTE: There’s a working Spring Boot application demonstrating this at https://github.com/Setfive/spring-demos

For many applications a security and authentication scheme centered around users makes sense since the focus of the application is logged in users taking some sort of action. Imagine a task tracking app, users “create tasks”, “complete tasks”, etc. For these use cases, Spring Boot’s Security system makes it easy to add application security which then provides a “User” model to the rest of the application. This allows your code to do things like “getUser()” in a Controller and have ready access to the currently authenticated user.

But what about applications that don’t have a user based model? Imagine something like an API which provides HTML to PDF conversions. There’s really no concept of “Users” but rather a need to authenticate that requests are coming from authorized partners via something like an API key. So from an application perspective you don’t really want to involve the user management system, there’s no passwords to verify, and obviously the simpler the better.

Turns out its very straightforward to accomplish this with a Spring managed Filter. Full code below:

package com.setfive.demo.apiheaderdemo.filter;
import com.setfive.demo.apiheaderdemo.entity.ApiKey;
import com.setfive.demo.apiheaderdemo.repository.ApiKeyRepository;
import org.slf4j.Logger;
import org.slf4j.LoggerFactory;
import org.springframework.stereotype.Component;
import org.springframework.stereotype.Service;
import org.springframework.web.filter.GenericFilterBean;

import javax.servlet.FilterChain;
import javax.servlet.ServletException;
import javax.servlet.ServletRequest;
import javax.servlet.ServletResponse;
import javax.servlet.http.HttpServletRequest;
import javax.servlet.http.HttpServletResponse;
import java.io.IOException;
import java.util.Optional;

@Component
public class ApiKeyRequestFilter extends GenericFilterBean {

    private static final Logger LOG = LoggerFactory.getLogger(ApiKeyRequestFilter.class);

    private ApiKeyRepository apiKeyRepository;

    public ApiKeyRequestFilter(ApiKeyRepository apiKeyRepository){
        this.apiKeyRepository = apiKeyRepository;
    }

    @Override
    public void doFilter(ServletRequest request, ServletResponse response, FilterChain chain) throws IOException, ServletException {
        HttpServletRequest req = (HttpServletRequest) request;
        String path = req.getRequestURI();

        if(path.startsWith("/api") == false){
            chain.doFilter(request, response);
            return;
        }

        String key = req.getHeader("Key") == null ? "" : req.getHeader("Key");
        LOG.info("Trying key: " + key);

        Optional<ApiKey> apiKeyOptional = this.apiKeyRepository.findOneByKey(key);
        if(apiKeyOptional.isPresent()){
            chain.doFilter(request, response);
        }else{
            HttpServletResponse resp = (HttpServletResponse) response;
            String error = "Invalid API KEY";

            resp.reset();
            resp.setStatus(HttpServletResponse.SC_UNAUTHORIZED);
            response.setContentLength(error .length());
            response.getWriter().write(error);
        }

    }

}

The code is pretty straightforward but a couple of highlights are:

  • It’s a Spring Component so that you can inject the repository that you need to check the database to see if the key is valid
  • It’s setup to only activate on URLs which start with “/api” so your other routes wont need to include the Key header
  • If the key is missing or invalid it correctly returns a 401 HTTP response code

That’s about it! As always questions and comments welcome!

AWS Modern Application Development E-Book

Amazon Web Services recently published an E-Book on modern application development. In short, this guide explains the significance of digital transformation and how it can reinvent how your business delivers value. The main topics covered include: Digital Innovators, Characteristics of Modern Applications, Data Management & Computing in Modern Applications, and Security & Compliance. Below, I have summarized a few takeaways from each topic.

Digital Innovators

To be a digital innovator, you must work backwards to understand that innovation starts with your customers and listening to their wants and needs. AWS calls this process the “innovation flywheel.” The innovation flywheel consists of three steps: listen, experiment, iterate. After putting your customers first, it is essential to put technology at the center of your business. Some ways to do this are through digital marketplaces (two sided market that connects buyers and sellers,) direct-to-customer engagement, digital products as services, and insight services.

Characteristics of Modern Applications

Modern application development is a powerful approach to designing, building, and managing software in the cloud. Characteristics of Modern Applications align with digital innovation (see above.) Modern Applications require a culture of ownership, which also starts with the customers. To create this culture, companies should hire builders and support them with a belief system and let them build. It is important to trust in others skill sets and know where your boundaries lie. In terms of the architectural patterns of modern applications, most are micro-services. Micro-services have minimal function services, are deployed separately but interact together, each has its own datastore, is organized around business capabilities, the state is externalized, and provides a choice of technology for each micro-service.

Data Management & Computing in Modern Applications

Data management refers to purpose built databases that serve as decoupled data stores. Data management includes computing in modern applications. Computing with micro-services effect the way you package and run code, and compute in modern applications such as AWS Lambda. Release pipelines in AWS are standardized and automated. This means that they are no longer manual, there is continuous integration and continuous delivery. Also, there is a server-less operational model. These models are ideal for high-growth companies that want to innovate quickly because they don’t require server management, they provide flexible scaling, you pay for the value you need, and they automate high availability.

Security & Compliance

Security configuration and automation are needed. To ensure security and compliance, these practices are incorporated within the tooling. Some of this tooling includes code repositories, build-management programs, and deployment tools. Security and compliance are also applied to the release pipeline itself and the software being released through the pipeline. Lastly, DevOps and DevSecOps safeguard security and compliance. AWS defines DevOps as, “the combination of cultural philosophies, practices, and tools that increases an organization's ability to deliver applications and services at high velocity.” Similarly, DevSecOps is described as “philosophy of integrating security practices within the DevOps process. DevSecOps involves creating a “Security as Code” culture with ongoing, flexible collaboration between release engineers and security teams.”

I hope that you found these summary useful. We will continue to try to summarize AWS content so that you don't have to read it or navigate demo vids / webinars. Like what you read? Check out our blog post on why AWS is so cool: https://shout.setfive.com/2019/07/11/what-makes-the-aws-cloud-so-cool/.

QA: An afternoon with the Rainforest QA test builder

Even in 2019, software testing is still a challenge for a lot of small companies. Testing is usually not prioritized amongst small teams. Small teams frequently lack a dedicated QA resource, this causes writing good tests to be a unique skill in itself. Because of this, teams will end up with maturing software products that have few or no tests. As development continues, the downside is that there is an increased potential for bugs to enter the product. So, how can small teams tackle this challenge? As the software development industry has evolved, the industry has developed a wide array of quality assurance (QA) tools and techniques. Broadly, these tools can be categorized into two buckets - manual (human) testing and automated testing.

Manual / human testing is essentially exactly what it sounds like. A human QA engineer manually executes a list of steps, evaluates the results, and decides if the tested software is passing. Manual testing is relatively easy to start because non-technical resources can develop and execute the tests. However, as the test suite grows, teams run into issues because they’re limited by how many QA resources they have. This leads to teams only running tests before certain deployments, causing them to miss bugs.

In contrast to manual testing, automated testing is typically entirely code based. A QA engineer writes tests in a general purpose programming language. This asserts that the tested software is still working as anticipated. Since the tests are executed by a computer, this approach does not suffer from the limitation highlighted above. The trade off is that, because the tests are written in a programming language, technical resources are required to develop the tests.

So, what if there was a hybrid approach that combined some aspects of each approach? Well, that’s why you’re here! Say hello to RainforestQA.

What is RainforestQA?

RainforestQA is a SaaS product that incorporates manual and automated software testing approaches. RainforestQA offers a free trial, followed by a pay-as-you-go billing model, where you only pay for the resources being used. RainforestQA tests are executed by an automated system, or human testers, depending on how the test is constructed.

What does an automated RainforestQA test look like?

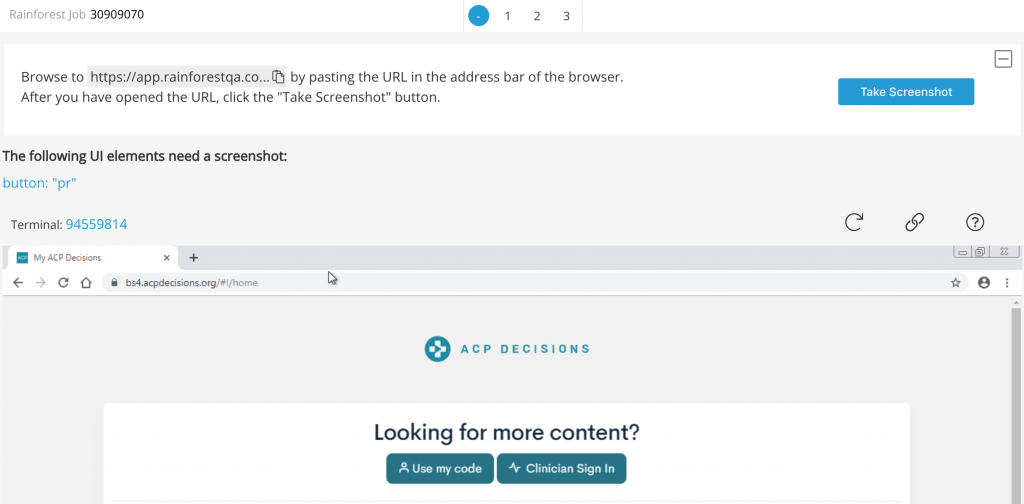
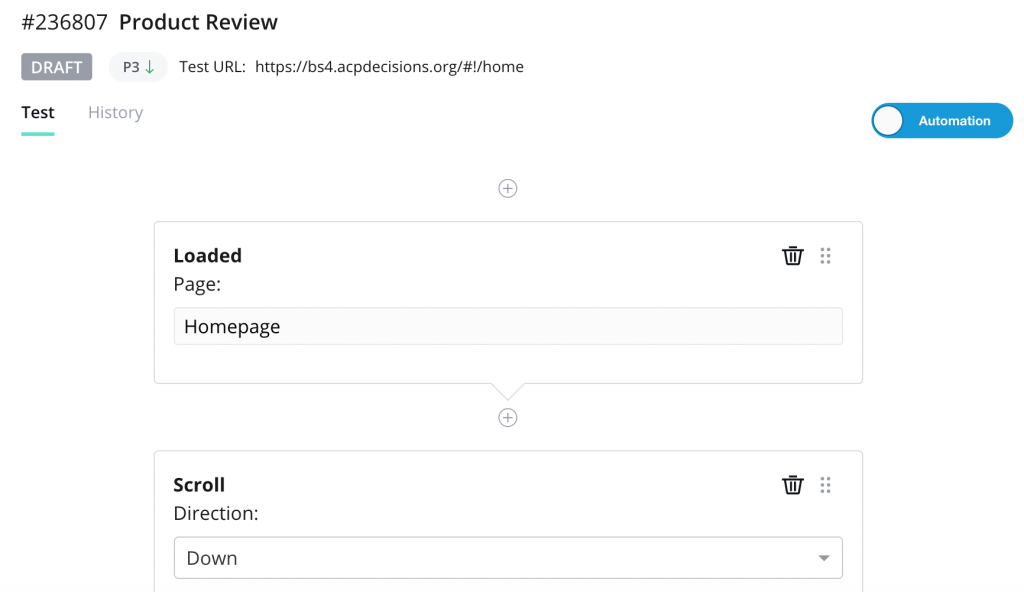
The tests are composed of a series of steps, which describe actions or assertions, that the automated system must take. The steps can include, “load this page” or “scroll the page down,” while the assertions are things like, “see a button” or “confirm text on the page.” When any one of these steps / assertions fail, the entire test fails, which indicates that something is broken in the software being tested.

What’s the process of building these automated tests?

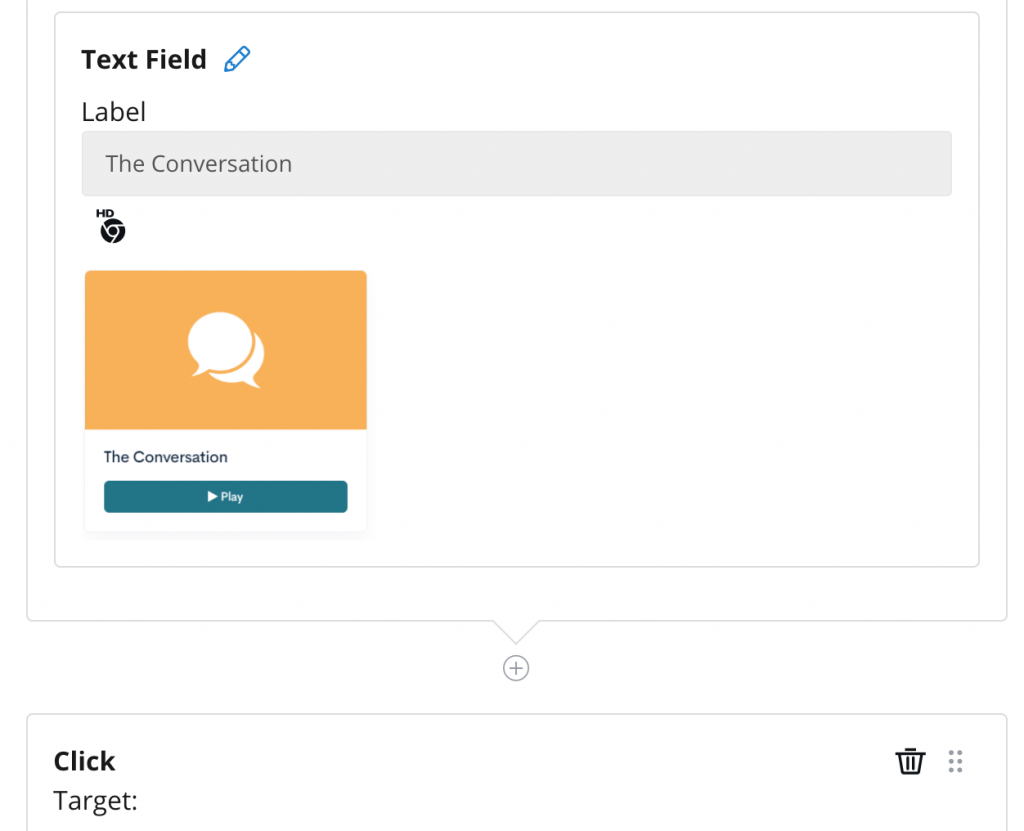
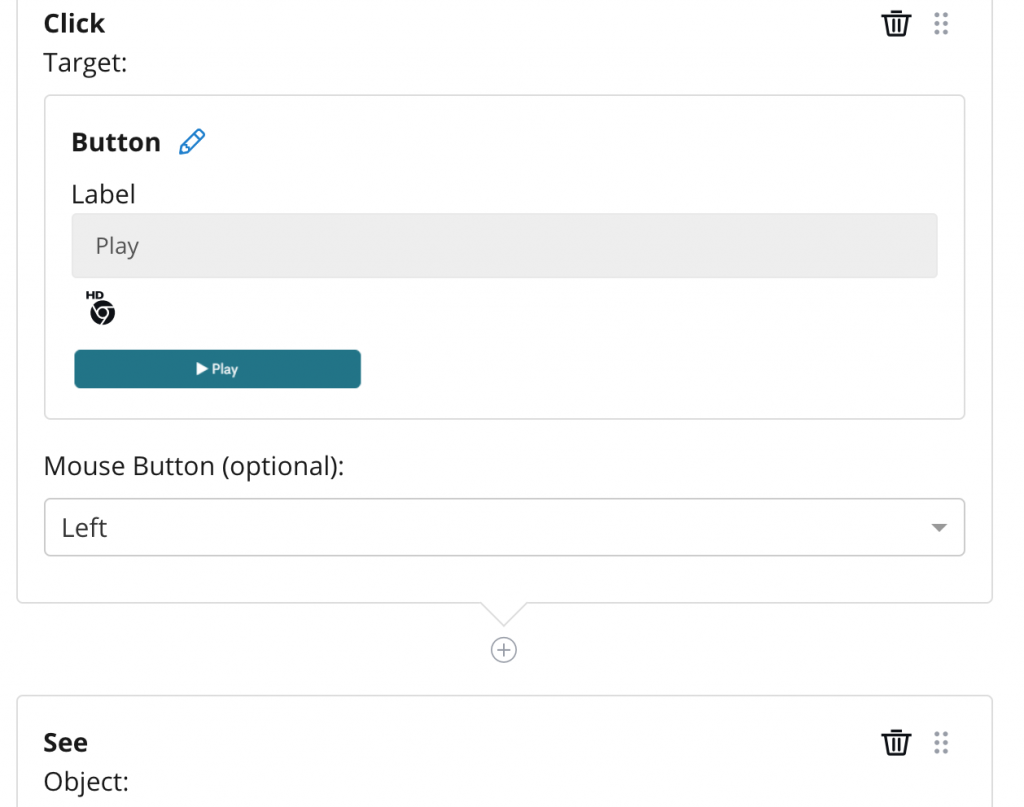
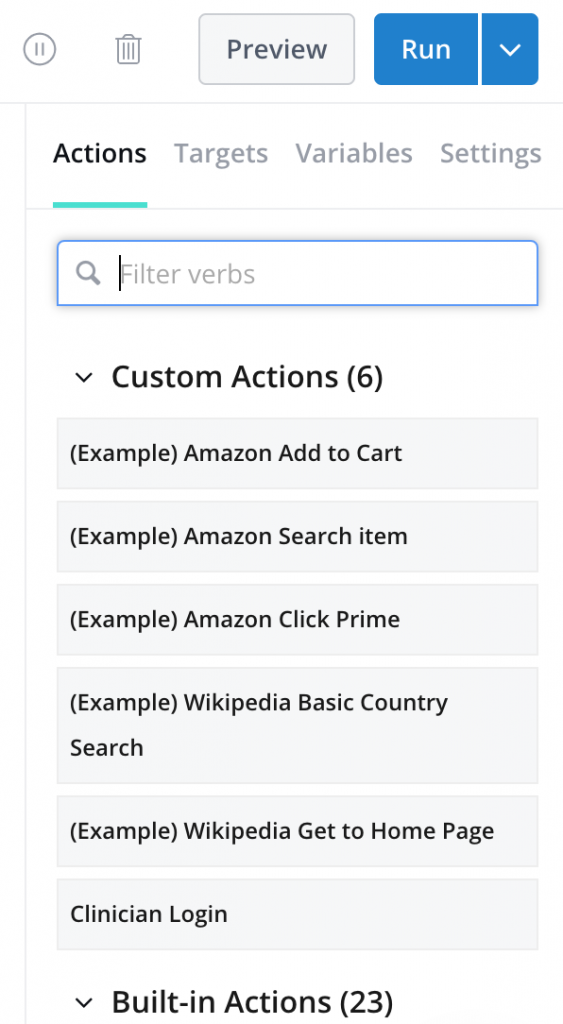
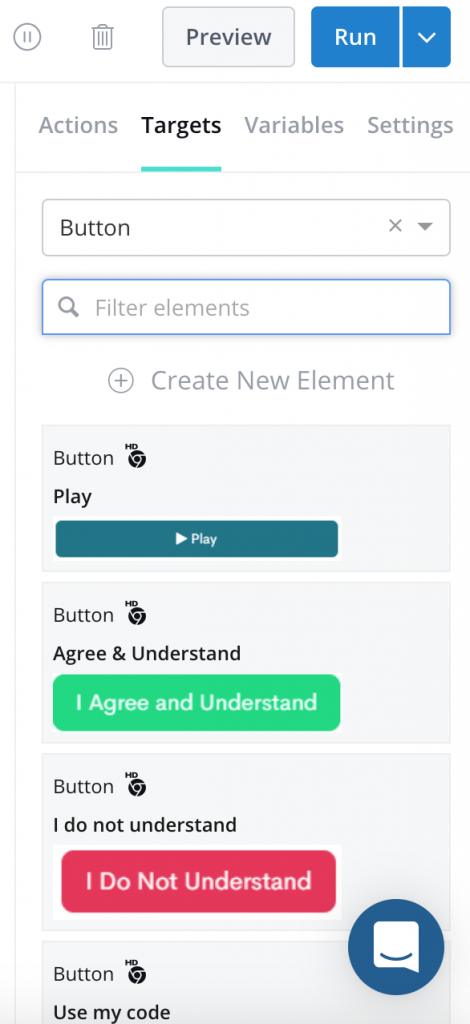
Building automated tests on the Rainforest QA differs depending whether it is written in Plain English or Beta Language. When constructed in English, the user is constructed to write their own question and answer for each step. If the test is written in Beta Language, an action can be selected from the sidebar on the right, followed by a target, which is also listed on the same sidebar. The types of actions and targets can be adjusted depending on the test and what is being assessed.

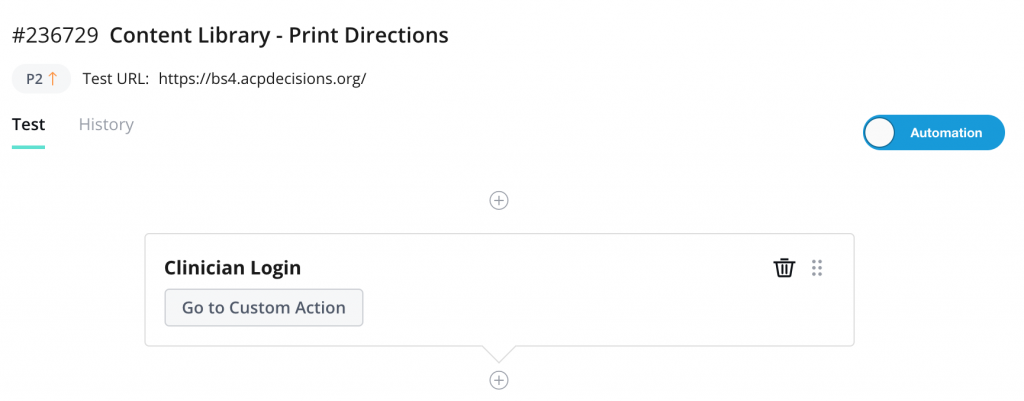
When composing certain tests in Beta, you will find that the same sequence of steps are needed. Instead of writing out every individual step, over and over, the “custom actions” feature can be used. This feature enables a series of steps to be grouped together, which saves a lot of time and energy. I found the custom actions feature exceptionally useful when a login was required at the beginning of the test. However, a flaw in this feature can appear if the actual custom actions, itself, is being tested. The test results for a custom action will not appear unless the results page is reloaded. While this is a very small detail, it was a fairly substantial inconvenience for me. The rest results appeared as though the custom action test was in progress for over an hour, when in actuality, the test results were returned within a few minutes, they just did not appear until the page was refreshed.

How does the back-and-forth work between users and Rainforest QA engineers?

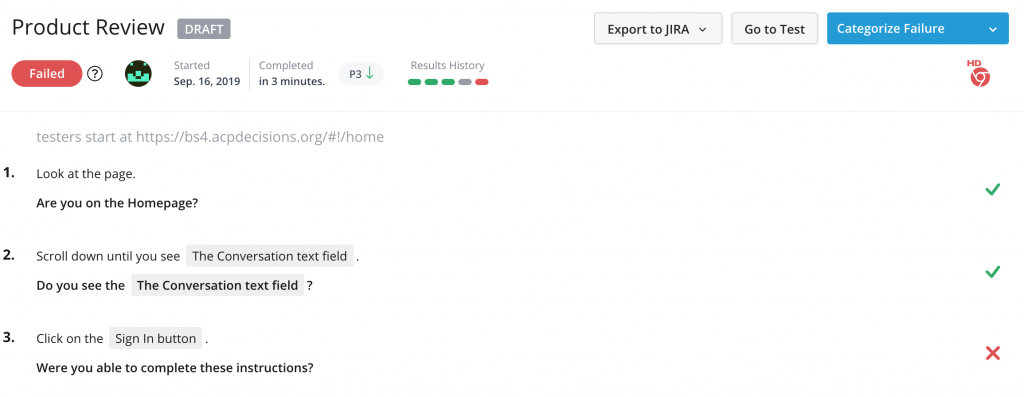
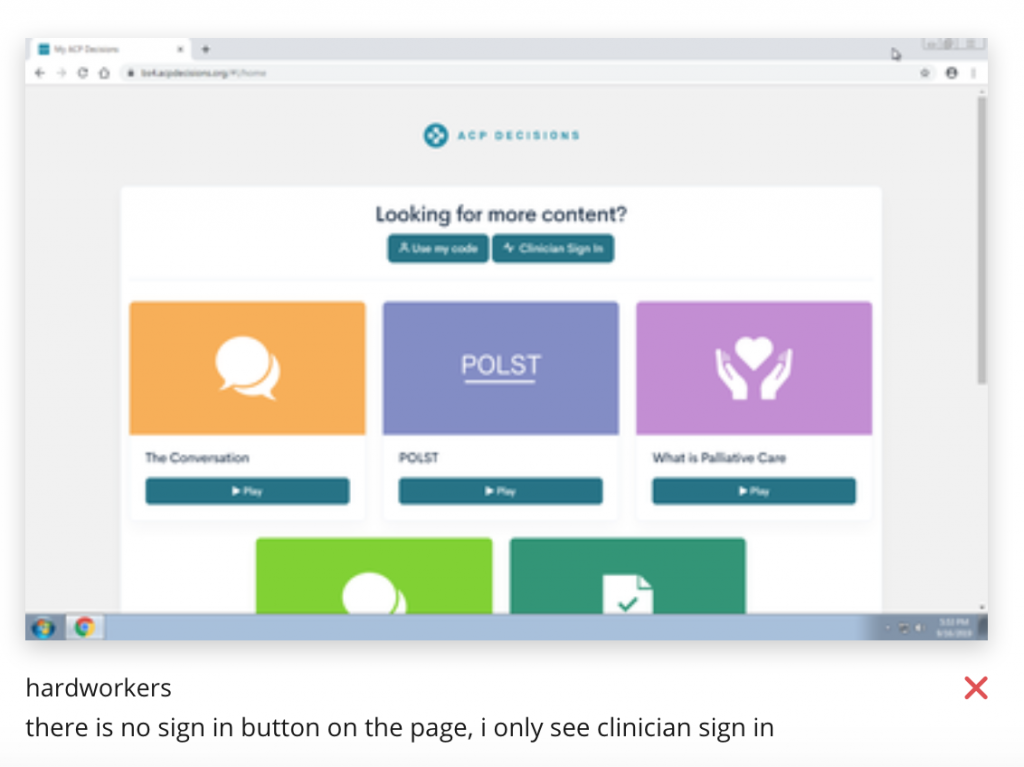
When running a test, everything is sent through a real and active test team of almost 60,000 testers. The test team provides clear feedback in a timely manner. If the test is passed, it will appear in green (as pictured above.) If the test is failed, it will come back in red. If the “Go To Test” button is selected, the test feedback can be viewed. Specific comments and critique are given on the particular step that caused the test to fail. Additionally, all of the tests and results are automatically recorded and stored in a neat and orderly fashion.


What is the Difference Between Testing Languages?

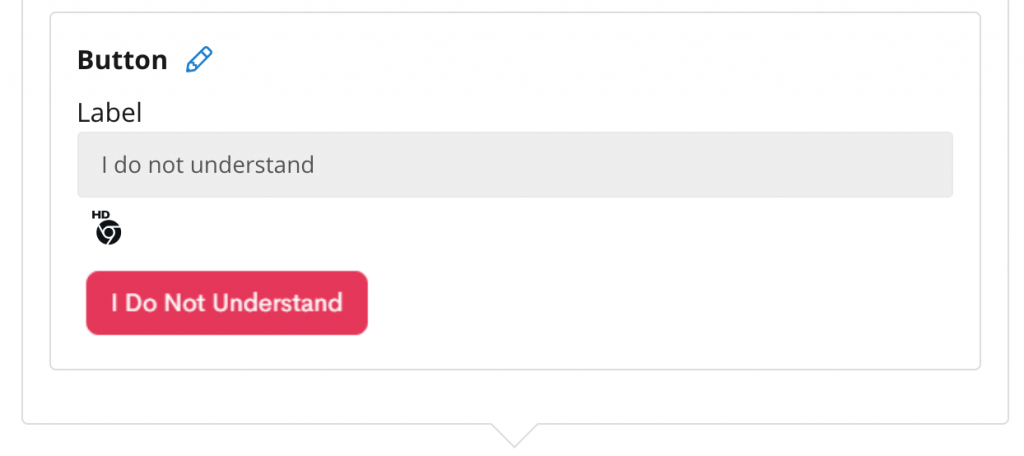
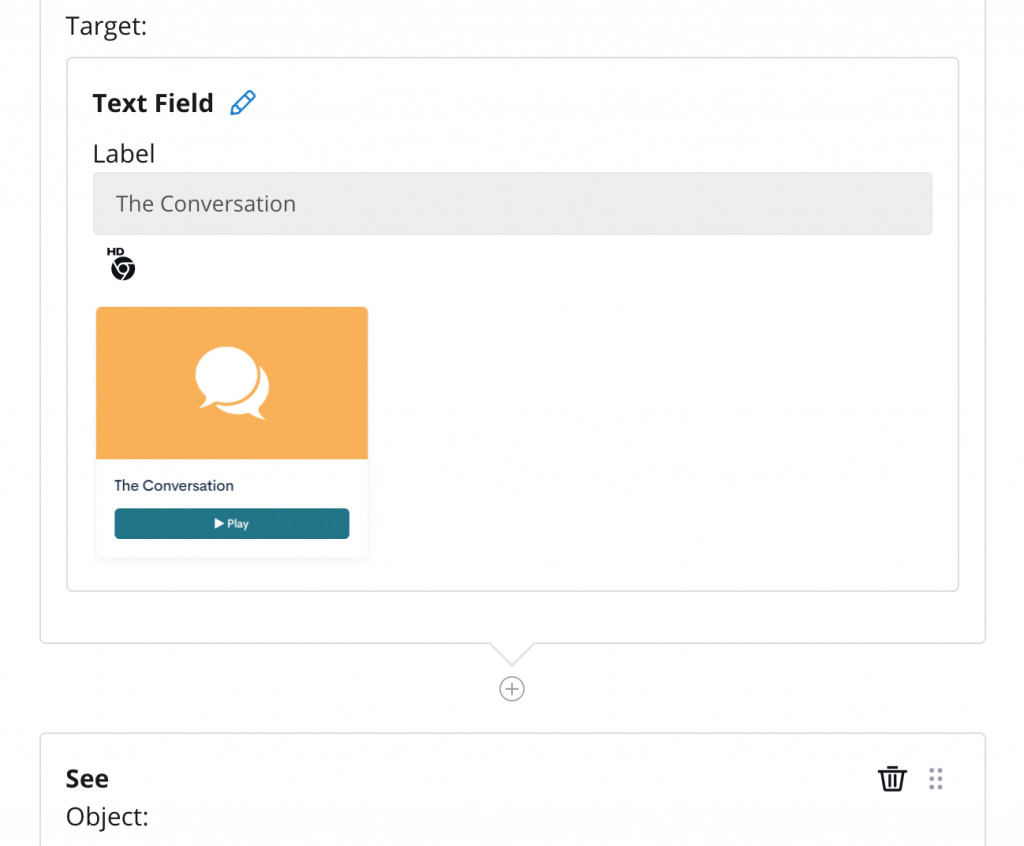
As discussed, on the Rainforest QA, tests can be written in “Plain English” or “Beta Language.” Writing tests in plain english is faster and easier, but also much more expensive. For a test to be passed in “Plain English,” the tests have to be written and constructed in a very specific way. For example, if you wanted to test the login page while leaving the username or password blank, you cannot use the “type” action to exemplify that you are leaving it empty. With the Beta Language tests, you have to select a specific action from the bar on the right, followed by a target. The only choices are what is already listed. In Beta, you have the option to use custom actions, you can also make new targets, but only by labeling a pre-existing type of target. When conducting a test in beta language, screenshots are used to identify what should be seen/clicked on each page. The downside being, if there are three of the same buttons on one page, you cannot type in directions, nor can you describe which of the three identical buttons needs to be selected.


Conclusion

I haven’t plugged Rainforest into our development workflow, so I cannot speak on the integrations or reporting. However, I would recommend the Rainforest QA to anyone- regardless of their technical ability- that wants to run automated tests on a timely and inexpensive budget. Building tests on this QA very quick and straightforward. While you may find a few complications and specificities on each language, it typically would not take more than one revision to fix the issue.

TL ; DR

Likes:

  • Interface is easy to use
  • Variety of features available to test
  • Access to a test team that provides feedback quickly
  • Non-technical users can build tests and test the UI without writing code
  • Free trial and then pay as you go pricing
  • Custom actions

Dislikes:

  • Tests written in Plain English language ask for specific answers on tests which allows a huge margin for error including spelling, spacing, and plurals
  • Have to be written and constructed in a very specific way to be passed and you can’t use any screenshots to clarify directions
  • Screenshot feature for capturing targets do not always capture / appear
  • Cannot specify instructions on Beta language