Display Ad Preview Tool
Looking for a way to preview online display ads and automatically save a screenshot/grab/capture?
Based on conversations we’ve had with one of our consulting clients, Datapoint Media, who are very familiar with the online advertising industry, it became quickly apparent that there really isn’t a good automated solution currently out there. When a buyer asks for “proofs” of their banner ads on the main sites that they will appear in, Ad Operations personnel are faced with two less than thrilling (and quite time intensive) options:
- Grab screenshots of the sites that the client would like to preview and download the standalone display ad images the client is buying. Then open up Photoshop or other photo editor and copy and paste those ad images over the existing banner ads on the screenshot of the target websites.
- Wait until the campaign is in flight and hope to catch lightning in a bottle by loading up the website the ad is likely to rotate into, refreshing the page continuously until the ads the clients bought appear, and finally taking a screenshot of the site.
Imagine having to do this every day week in and week out for hundreds of client orders.
Given the strong demand for a tool and a lack of automated solutions, we worked with Datapoint Media to build a tool as part of their existing Audience Extension platform .
Here’s how the Banner Ad preview tool works:
- Simple web based UI allows users to enter a website URL for which they’d like to preview the ads on. Once selected, the website is displayed in an iframe “preview window” to allow the user to get the lay of the land and see the current ad layout of the website.
Users can choose from 3 options on how they want to input the banner ad/creative images they want to display on the selected site. The 3 options are:
- Upload the actual image file(s)
- Enter the url(s) of the creative images
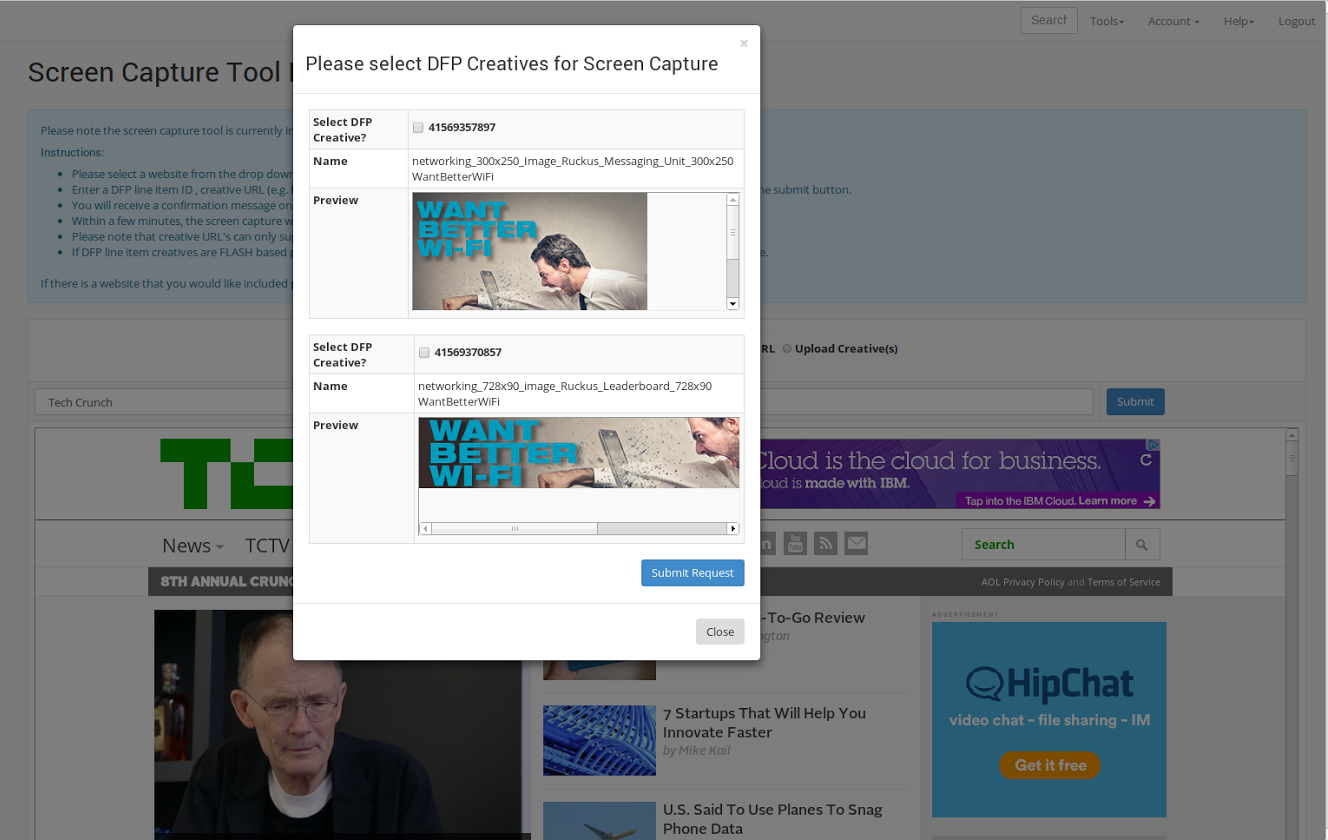
- Enter the Ad Server (such as Google’s DoubleClick For Publishers DFP) line item/ campaign ID that contains the creative ad image

- At this point, users submit the preview request. If they chose the Ad Server ID entry method, the Ad Servers API is pinged for a listing of all the associated creative images. After that, users select which creatives they want to include in the screenshot.
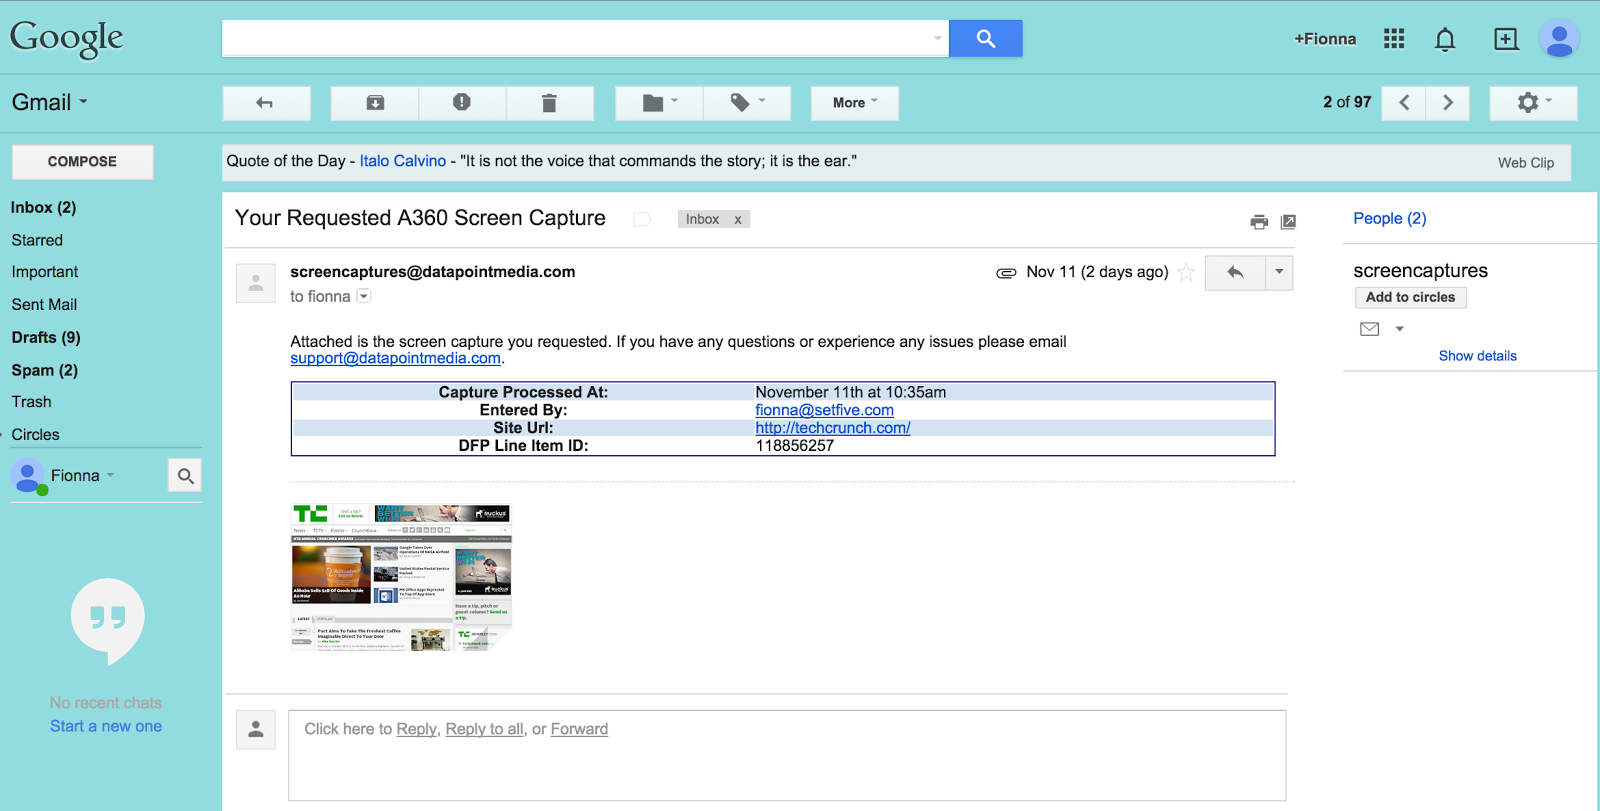
- The request is placed in a queue to be automatically processed. Next, users are presented with a confirmation that they will receive an email with the screenshot file attached within a few minutes. No need for any more work to be done by humans, it’s time for the robots to do the heavy lifting.
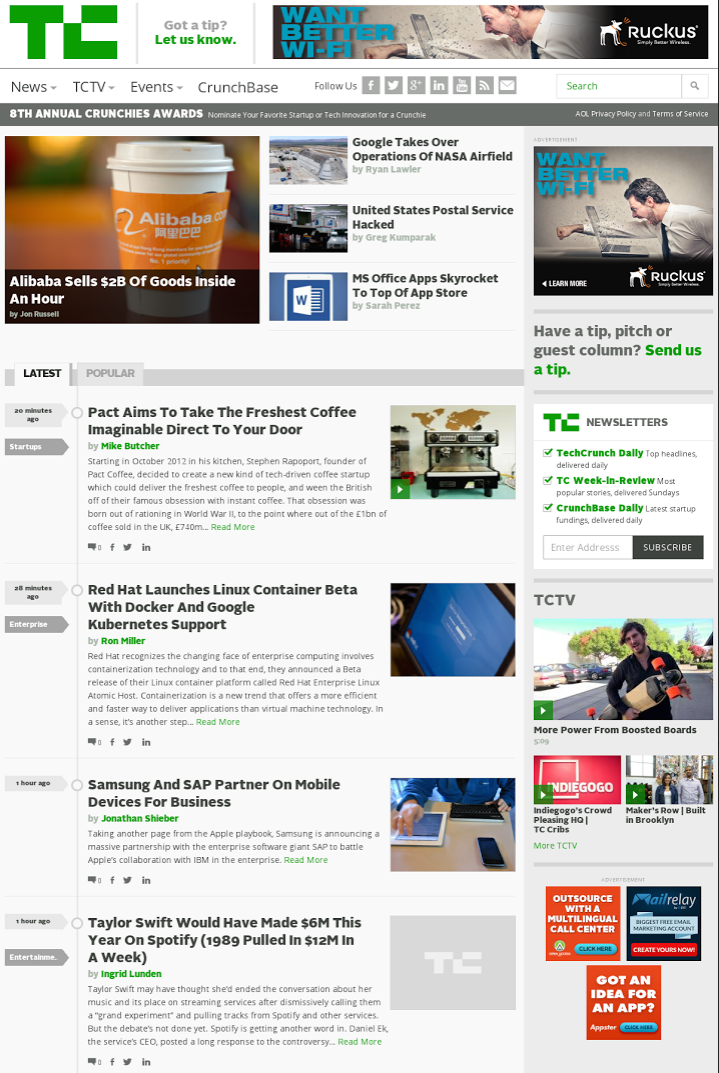
- Behind the scenes the tool loads up an “invisible” browser window on the server which points to the target website. Next it executes a series of commands to inspect the website determining where the valid ad slots are located. Once the slots are defined, it matches up the open slots with the dimensions of the banner ads that the user has selected. If the dimensions match, it replaces the existing ads on the website with the user entered banner ads and takes a screenshot.

- The resulting screenshot file is saved on the application server and automatically emailed to the user.
If you have any questions or are interested in gaining access to the tool, feel free to contact the guys over at http://www.datapointmedia.com.
Questions or comments about this? Email us at contact@setfive.com.